

Hello, Rehab Fans, and welcome to Day Five of The Great Glitzy Hack Off!!!
You guys have put forth an amazing effort and produced projects
that have taken our breath away!
Let's raise a glass of apple cider and and toast a wild week of serious hacking genius!

But we aren't done yet!
THIS.
THIS was one I had to do.
And it had to be weighty, tall, definitely not a FAIL.

So I did what anyone would do.
I got the following together:
Four 4.5 inch terra cotta plant saucers
Four 7 inch terra cotta plant saucers
Two feet of 3 inch PVC pipe
A whole lotta shells
Hot glue gun and hot melt sticks, NOT low melt
Goop silicone adhesive
Rustoleum Gloss White spray paint for all surfaces including plastic
1 hack saw

First, cut the pipe in half and sand the edges until they are as close to perfectly
level as possible.

Have a professional inspect your work and issue a permit.

Slather Goop on the wide rim of the 4.5 inch saucers.

These will nestle perfectly...

...right in the bottom indentation of the seven inch saucer.

Nice and snug, eh?

Do this 4 times...

...and allow this to dry for a half hour or so.

Now, stand the pipe in the indentation on the bottom of the smaller saucer.
It should fit perfectly.
(Check these fits before you leave the hardware store and adjust
the size of your materials.
Not all terra cotta manufacturers are alike.)
My pipe was not perfectly vertical, so I shimmed
the base with a small twist of wire to correct that.

Now, get all kinds of gloppy with the Goop,
drowning that wire.

Set your pipe in the Le Brea Tar Pit you created.

Make sure it's perfectly vertical.
This is very important.
You do not want your pillar listing to starboard.
Allow this to dry completely.

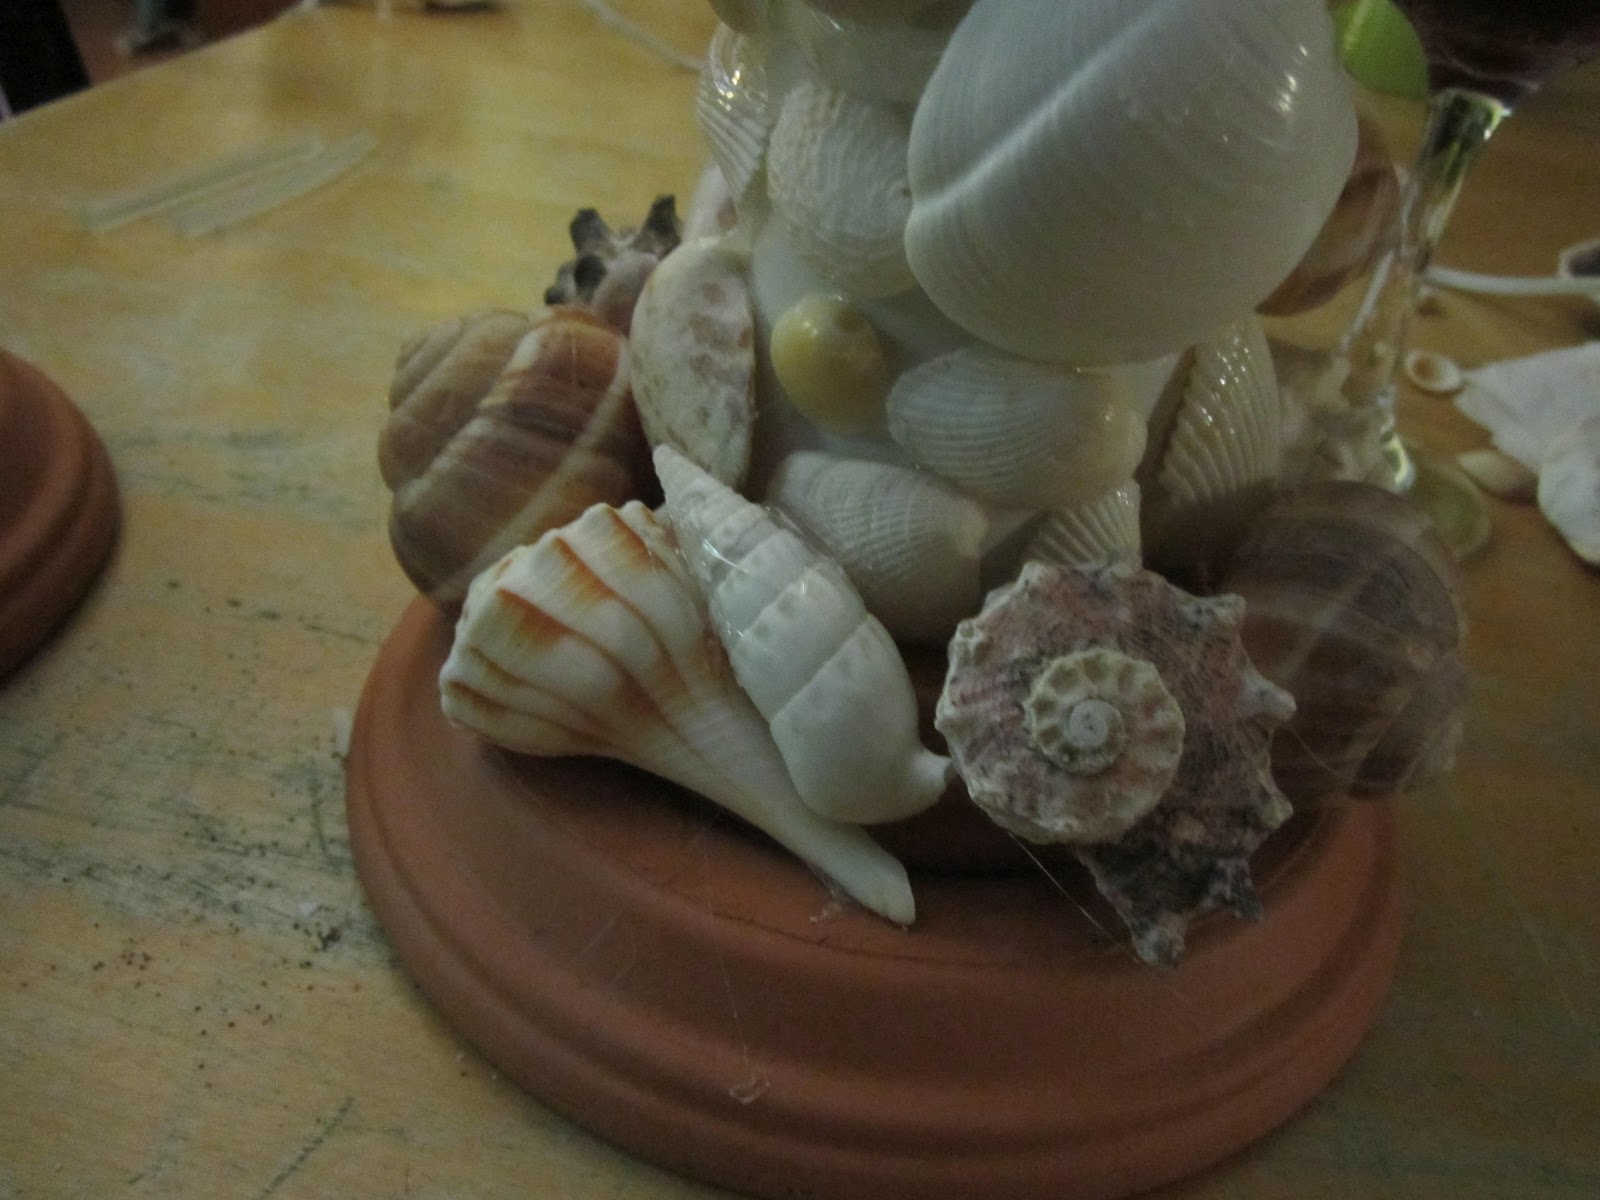
Working from the bottom, Goop on a base covering of clam shells and scraps over the PVC.

Keep building until the column is fairly covered with a single layer.
Let this dry.
I know, I know.
Chill out.
It HAS to dry thoroughly.
You can at this point switch to hot glue.
Starting at the bottom, build a wide base of larger shells.
Cover the smaller saucer, and start thinking decorative.
Get all artsy up in here.

Place the shells like puzzle pieces, and add more glue after the fact if needed.

Head upward.

Oh yeah.

Beverage pairing for this project?
Welch's Sparkling Red Grape.
Slight giddiness courtesy of 1:00 am.

Once the PVC is invisible, haul the Goop BACK OUT and attach the
top saucer assembly.

Go to bed.

Go.

It'll be dry in the morning.

Quit messing around, it's fine.

Fine.
One more shell.
But that. Is. IT.

Unplug the glue gun, and don't forget your phone.

So at dawn the next morning, take your completely dry and rock solid pillars outside.

Let's take a moment to admire the fine job a childhood of gluing macaroni to
construction paper has made possible, shall we?

Okay, enough of that.
Remove any lingering glue webs and get the paint.

Three light coats of gloss white will do it.
Make sure you turn the thing and get every inch doused,
as well as your hands.
Now, are we ready?

Ooooooooooooooooooooo!

Ahhhhhhhhhhhhhhhhhhhhhhhhh!
The Oceania Pillar Holder for $34.95.

The Rehab Hack Job for about six bucks.

I'm slightly please at the results.


Do we like?


The pillars are 16", and with the purchased hurricanes, they stand 24".

Now, enough about me, let's talk about YOU.
Who else has been saving the best for last?
Let's have a little fun and inspire the weekend's activities, shall we?
I know I need some plastic spoons, silver paint, and a big honkin' clam shell bowl!
And where the heck do you buy Frozen Charlottes?

9 comments:
WOW! that is totally awesome! You did a great job Sunni whooot whooot clap clap clap
Oh my god....I bow to you! Those are awesome! I really wanted to create that one and just got so stuck on how to do it. Not only did you do it, you did it bigger and better! I am in awe, truly! This is why you rock!! and...once again you made me laugh....La Brea tarpit!! You are the best! and I have used way too many exclamation points. Did you fix your reader issue?
Holy Maccaroni!!! I swear I'm crushing on them so hard... don't even ask me why, but I saw a glimpse of Marie Antoinette passing them on one of her.. probably countless mantles and stopping to admire them a little. And I'm only on my first glass of wine.
That is an absolutely genius idea and so authentic looking! Very creative!!! I'm really loving them!!!
That is a fantastic hack! I was looking for wooden pillars for cheap for the base. HA! You made your own base! Very clever Sunny!!!
Incrediburgable! Supercalifragilisticexpialidocious! Sunny, today you win the internet. I am so impressed!
BTW, I live 4 blocks from the LaBrea Tar Pits. I love them, even though they smell a little on very hot days.
These are fabulous! You are so very talented. When do you get a book deal on teaching the world to hack beautifully???:)
Your version looks so much like the original! Love it! Your pillar holders actually look great with or without the white paint.
Hi! I found this through the wonderful Lisbon Lioness. these are a triumph. Like, seriously wonderful. They look fabulous in white. I bet they's look spiffy in matte black, too. Thank you for sharing in such a witty and wonderful way.
Post a Comment