
Welcome to Day One of
The Great Glitzy Hack Off!!!
Wanna play?
Here's how:
1. Check out my shopping trip to Z Gallerie
You already did that? Awesome!
2. Pick out something stunning, gather together some weird supplies
and cobble together your own version of sparkly eye candy.
Got that done too? You're good!
3. Post it on your blog with a tutorial so we can all just hack our brains out!
4. Please put my button or Steff at Three bed semi's button on your glittering success.

5. Last thing...leave a comment with the URL to your creation so we can all see it!
That's it!
On July 30th, we'll be posting a roundup to show off your genius.
That way, you know,
we can hack each other!!!
Ready?
It's time to hack something up!!!
(I'm not even sorry I said that.)

This was love at first sight.
Now, how to recreate the $19.99 beauties at a price that won't
make my Scottish wallet won't squeal?

Put on your thinking caps, people!
And, er...things other than people.

We'll start with some 4.5" terra cotta plant saucers and some Goop.

Goop is a great, clear adhesive that's waterproof and dries to a flexible,
rubbery consistency. It's my first choice for almost any project
because it will bond multiple materials to each
other and different things.
Like your daughter to a cat.

*The organized, well-oiled crafting process at Life in Rehab*

Next, we'll need some fabulous plastic fish tank coral.

Reasonably realistic for $1.96.

Now, if we look closely...

...you'll see there are seams in the coral.
What goes together must come apart.

But a couple of tugs aren't going to do it.

Let's bring in the big guns.

And the even bigger guns.
Seriously, the guy has some guns.

Once apart, we took a hack saw and cut 1/3 of the larger of the two pieces
off, so that each package of coral yielded 3 pieces.
For two candleholders, we used 3 packages,
so 9 pieces of coral.
We did the cut so the coral would wrap around the base
in an aesthetically pleasing manner.

The terra cotta was glued with the bottom sides together.
I arranged the plastic pieces around the base until I liked
the coverage and spacing.

Suggested Beverage Pairing for this project:
a dry, Spanish
I Can't Believe It's Not Champagne!
by Iberia.

Slathering the faux sea life thickly with adhesive...

...lean them against the base.

I'm talking lots of Goop.


I used short cylinder vases from The Dollar Tree to house a pillar candle.
Before I made this permanent, I made sure they would easily
slip into the base.

Remove the vase and tie the coral to steady it while it dries.


Now, this is my choice for just about any painting job.
It covers a myriad of surfaces without priming...

...including plastic!
Three light coats of Gloss White gave us full coverage, and we allowed
it an hour to dry fully.
The results?

Not too shabby, eh?

Beachy bliss at a fraction of the price.
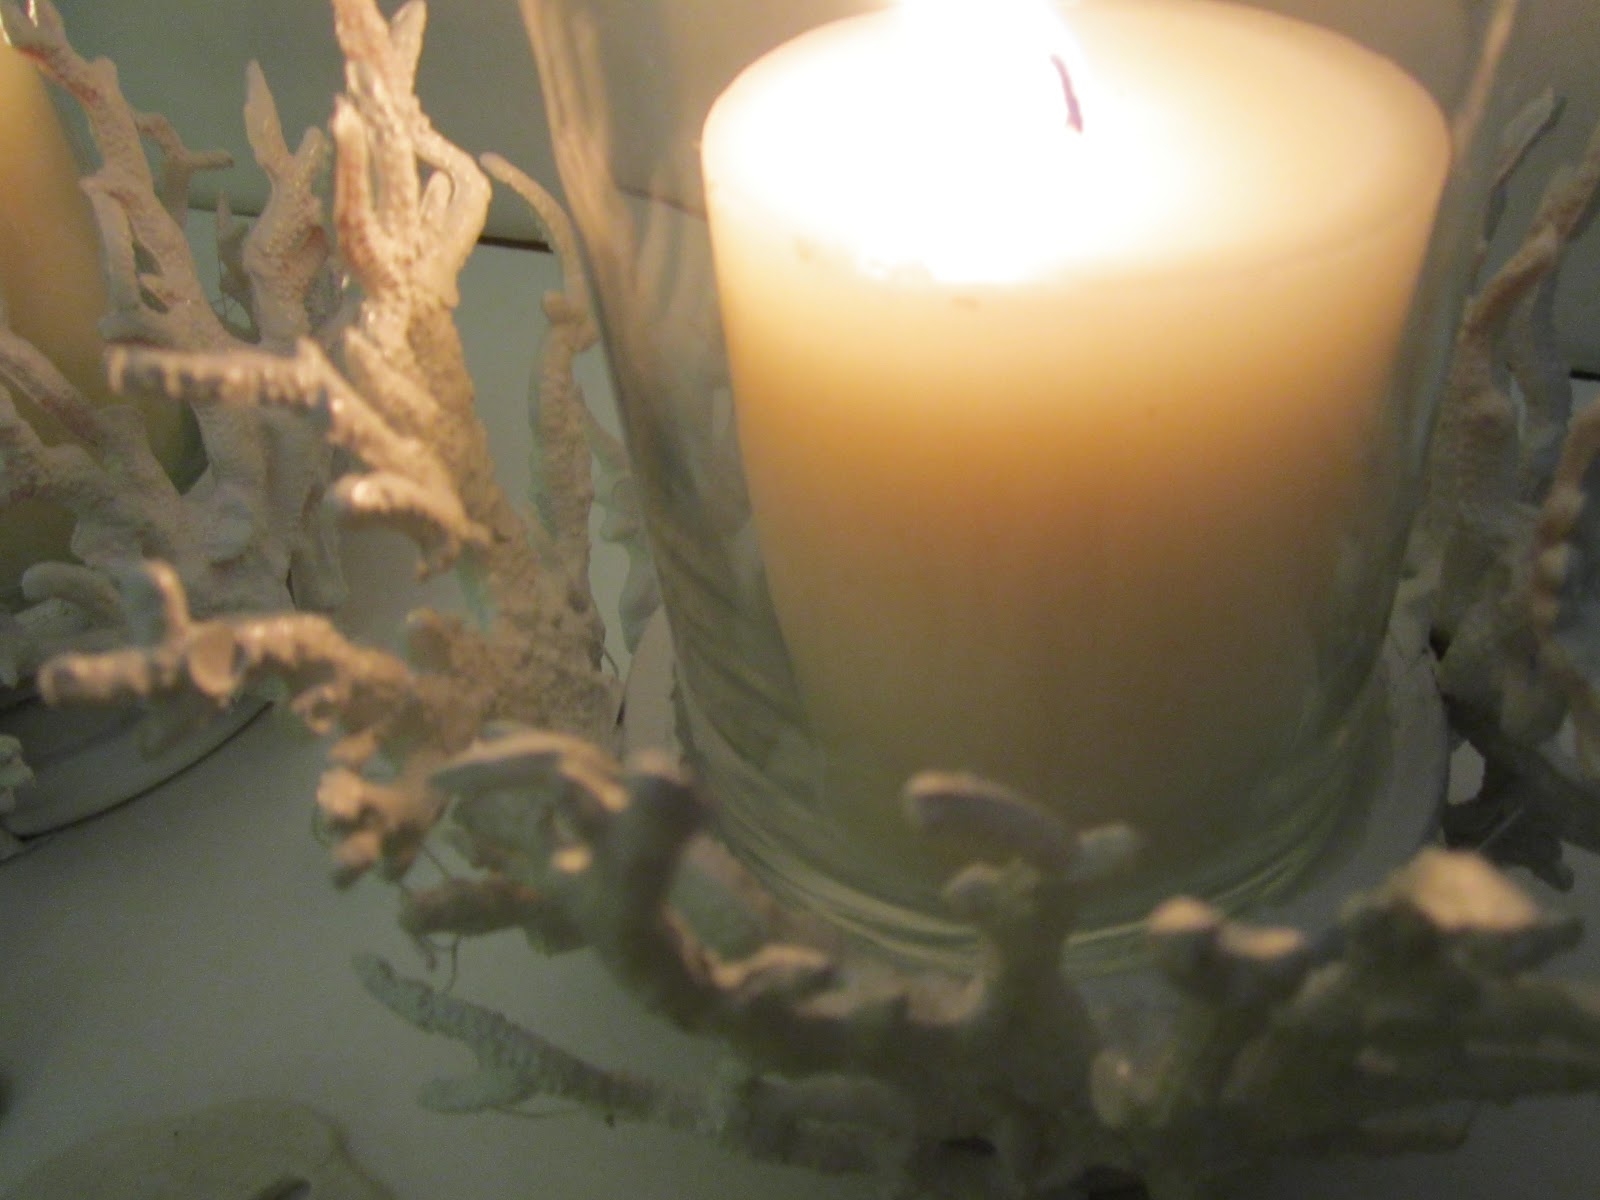
Take a closer look...

How's that for an even, shiny finish?

Pretty close to the original?
Mine are larger and lacier.

And mine rang up the following price tag:
Two vases ($1 each) $2
3 packages of coral ($1.96 each) $5.88
4 plant saucers ($0.77 each) $3.08
(I had the paint, but that runs about $3.50 per can)
Both candleholders were $10.96, as opposed
to $40 for the Z Gallerie originals.
LOVE.

Now, perhaps I should add our high price photography backdrop
to the bottom line.
It's an extremely vital part of the project.

It gives the illusion of calm, and a professional setting.

Without it...

...well, there's THIS.


So we'll just stay on this side.

Okay, I showed you mine, now let's see yours!
I'll of course be stalking everyone.
Where do you think I steal my ideas anyway?
 Raise the bar. We dare you.
12 comments:
Pure awesomeness! You nailed it! But then I knew you would! I couldn't for the life of me figure out how to wrap that coral around a vase. http://silohillfarm.blogspot.com/2012/07/glitzy-blue-vase_22.html
That turned out beautiful. My three projects are ready, but they are more of an illusion of or inspired by Z Gallerie merchandise. First up is the glitzy little night light.
http://distresseddonnadownhome.blogspot.com/2012/07/glitzy-little-night-light.html
I am not computer savvy and I guess you will know how to turn this into a link. If not let me know and I will send an email! That I can do.
Project number two is She Sells Seashells involving Frozen Charlotte dolls, chrome shells, and a glass funnel!
http://distresseddonnadownhome.blogspot.com/2012/07/she-sells-seashells.html
Third and final project (I hope I am not being a pig about this. Just tell me - I don't offend easily1) is my Silvery Tree Shells. the weirdest thing I have ever done. Sunny, you have certainly pushed me way out of my box!
http://distresseddonnadownhome.blogspot.com/2012/07/silvery-tree-shells.html
Sunny, this is AWESOME!!! And soooo . . . sophisticated! This looks more high end than the Z Gallerie item!! I really had a lot of fun re-creating some of the pieces: http://plumperfectandme.blogspot.com/2012_07_01_archive.html I'm a complete novice and look forward to seeing all the great bloggers and their ideas!!!
I love them so much... and no, not just because they are part of our lil' challenge, but because they really look fantastic. Exactly what I wanted (damn you UK sellers of faux corals, rot in hell for greed!) and really dang close to the original/ In fact, I like them better as they are, as you said, more feathery and look a lot less like some dead little tubes fished out of a damp beach puddle.
Had to wait a bit after reading your post as I was still cackling half an hour later! Seriously thinking about crafting some minions next.
Superb hackery! I am thrilled by how you got three pieces from one coral. Yours are truly better than the original! As always, rip roaringly great tutorial. Thanks, Sunny, so much fun!
Here's my giant clammmm: http://www.michlinla.com/2012/07/a-tale-of-two-clams.html
Wow. Great tutorial. I think I like yours a lot better!! They are sleeker! Love your blog. So fun!!
Yours are better than the original! Great hack Sunny!
I have no hacks to present... I just wanted to tell you how entertaining this post is, and that I truly admire everybody else's entries.
Awesomeness. LOVE!!!:)
Hi Sunny - I have also done a z-gallerie knock off - http://northshoredays.blogspot.co.nz/2012/07/simple-shell-display.html
Looking forward to linking up. Love your knockoff - it would look great on my table xx
Nat
Post a Comment