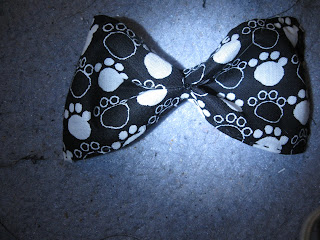
A little more of my daughter getting her craft on with back to school accessories!
So I'm in my room one day and I'm looking at all the tiny scraps of fabric I have. I'm looking at this (s)crap and, in the true nature of Life In Rehab, wondering what I could make out of it.
Then I remember the ridiculously cute hair bows I saw a few weeks back when my friend dragged me into one of those girlie 'fashion' stores at the mall! They were pretty much the only thing out of the entire store I wanted! But not in plain colors and not for 5 bucks each! So let's take those awesomely patterned scraps from the $1 fabric squares and make them into something awesome!
((I apologize in advance for the awkward lighting in my room!))

You will need:
some scrappy scraps
scissors
thread (I have two shown, but you only need one!)
needles and pins and stuff (or hot glue. I hand sew everything and recommend it!)
You'll also need either a glider clip, or a/some bobby pins. My preference is glider clips, but if you don't happen to have a card of glider clips like I do (don't ask), Bobby pins will probably work, too. Or try whatever you happen to have!
Cut your scrappy scraps into a rectangle a little bigger than 4x7 kitty paws. Or if you don't live in a house that measures in paw prints, a 2 ¾'' x 4 ¾'' (add some seam allowance!) rectangle.
Now pin down the edges. I'm going to hem mine so the edges don't get all nasty and frayed. If you're using hot glue, I still suggest hemming it. If you're using something like felt that doesn't fray, you don't necessarily have to.
Hemmed!
Now pinch up the middle! The pinch should be something like an M.
Now sew it up. I just sewed at the top. That's pretty much the only place you need to sew at this point.
You can stop here if you want (well, skip down to adding a clip first then stop). You'll have a very floppy bow, however. Very, very floppy.
Now make a smaller rectangle. Mine is about ¾'' x 2'' (of course with some seam allowance). Hem it!
Now wrap the tiny rectangle around the pinch in the middle of the bow. Sew it on. Make sure the rectangle is at least a little bit sewn to the bow so it doesn't fall off.
Now get your clippy thing and sew it on as well. My basic opinion is 'the more times you wrap the thread around it, the less likely it is to fall off.' And so far it seems to be a good philosophy. Of course, you'll occasionally want to sew into the fabric again so the clip is attached to the fabric. So wrap, wrap, wrap, wrap, wrap, sew, wrap, wrap, wrap, wrap, wrap, sew, wrap, sew, wrap, wrap, wrap, wrap, sew, tie a knot. Or something like that.
Now you have a gorgeous bow to do silly thing with; like clip it onto cat hats.
(Cat hat tutorial coming soon.)
Or do intelligent things like clip into your hair. Whatever lifts your shuttle craft!


1 comment:
That apple has not fallen far from the tree!! Love the tute Savannah!!
Post a Comment