
Okay, the tile is up!
And how could you not love the look?

Glittering glass flanked with natural, tumbled marble that picks up the blue to perfection.

We have these pretty Victorian gingerbread brackets that will nestle
under the cabinets over the sink to give it a little finishing touch.

But before we can add those, we need to add one little detail...
Grout.
Everything You Ever Wanted to Know About Hard Core Remodeling but Were Afraid to Ask!
is going to show you how to do just that!
Grout.
Everything You Ever Wanted to Know About Hard Core Remodeling but Were Afraid to Ask!
is going to show you how to do just that!

We'll just put the leftover tile away for a little surprise in the master bath.

The first thing you'll need is...well...grout.
Since we're working with glass tiles, we're using a non-sanded grout
so we don't scratch the surface.
This is a dry mix, so you're going to need...

...a bucket


You'll need a couple of new toys too.
You're already aware that square sponges exist.
The other thing is called a float.
You're already aware that square sponges exist.
The other thing is called a float.

A float is a handy little device with an ergonomic handle.
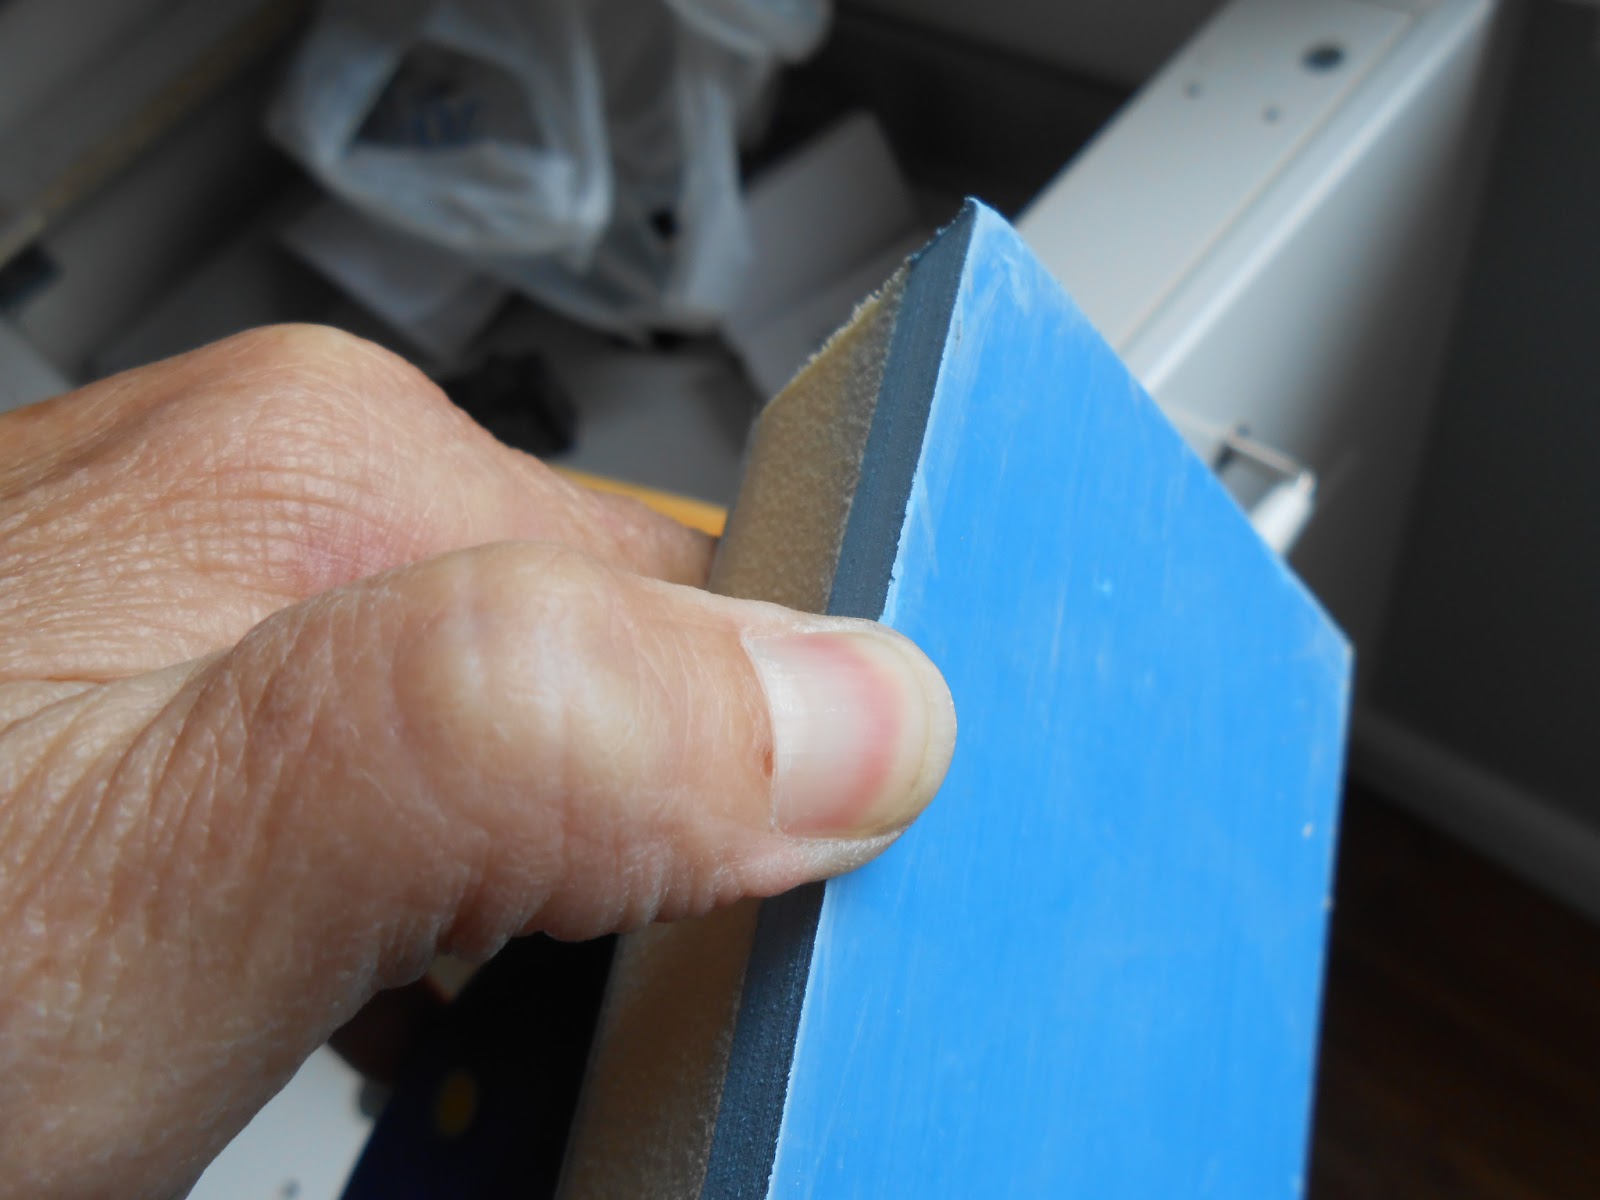
This flexible rubber surface is ideal for forcing grout between the tiles
without gouging, scratching, maiming, perfoating, breaking, spindling, crumpling,
or neutering them.
Yeah, I just wanted to see if you were paying attention.
without gouging, scratching, maiming, perfoating, breaking, spindling, crumpling,
or neutering them.
Yeah, I just wanted to see if you were paying attention.

So, we take our tiles, which are conveniently already on the wall
through the miracle of adhesive...
through the miracle of adhesive...

We keep a container of water at the ready.
No, I'm not really using spring water for this.
I drank that.
No, I'm not really using spring water for this.
I drank that.

Empty your grout-y powder into your bukkit...er, bucket...and add water as required.

Using a trowel, mix it up.

When it's a nice stiff slurry, you're ready
to let 'er rip!
to let 'er rip!

Ew.

Anyway....

Scoop up some grout mess with your float.

Slather the wall with that stuff.
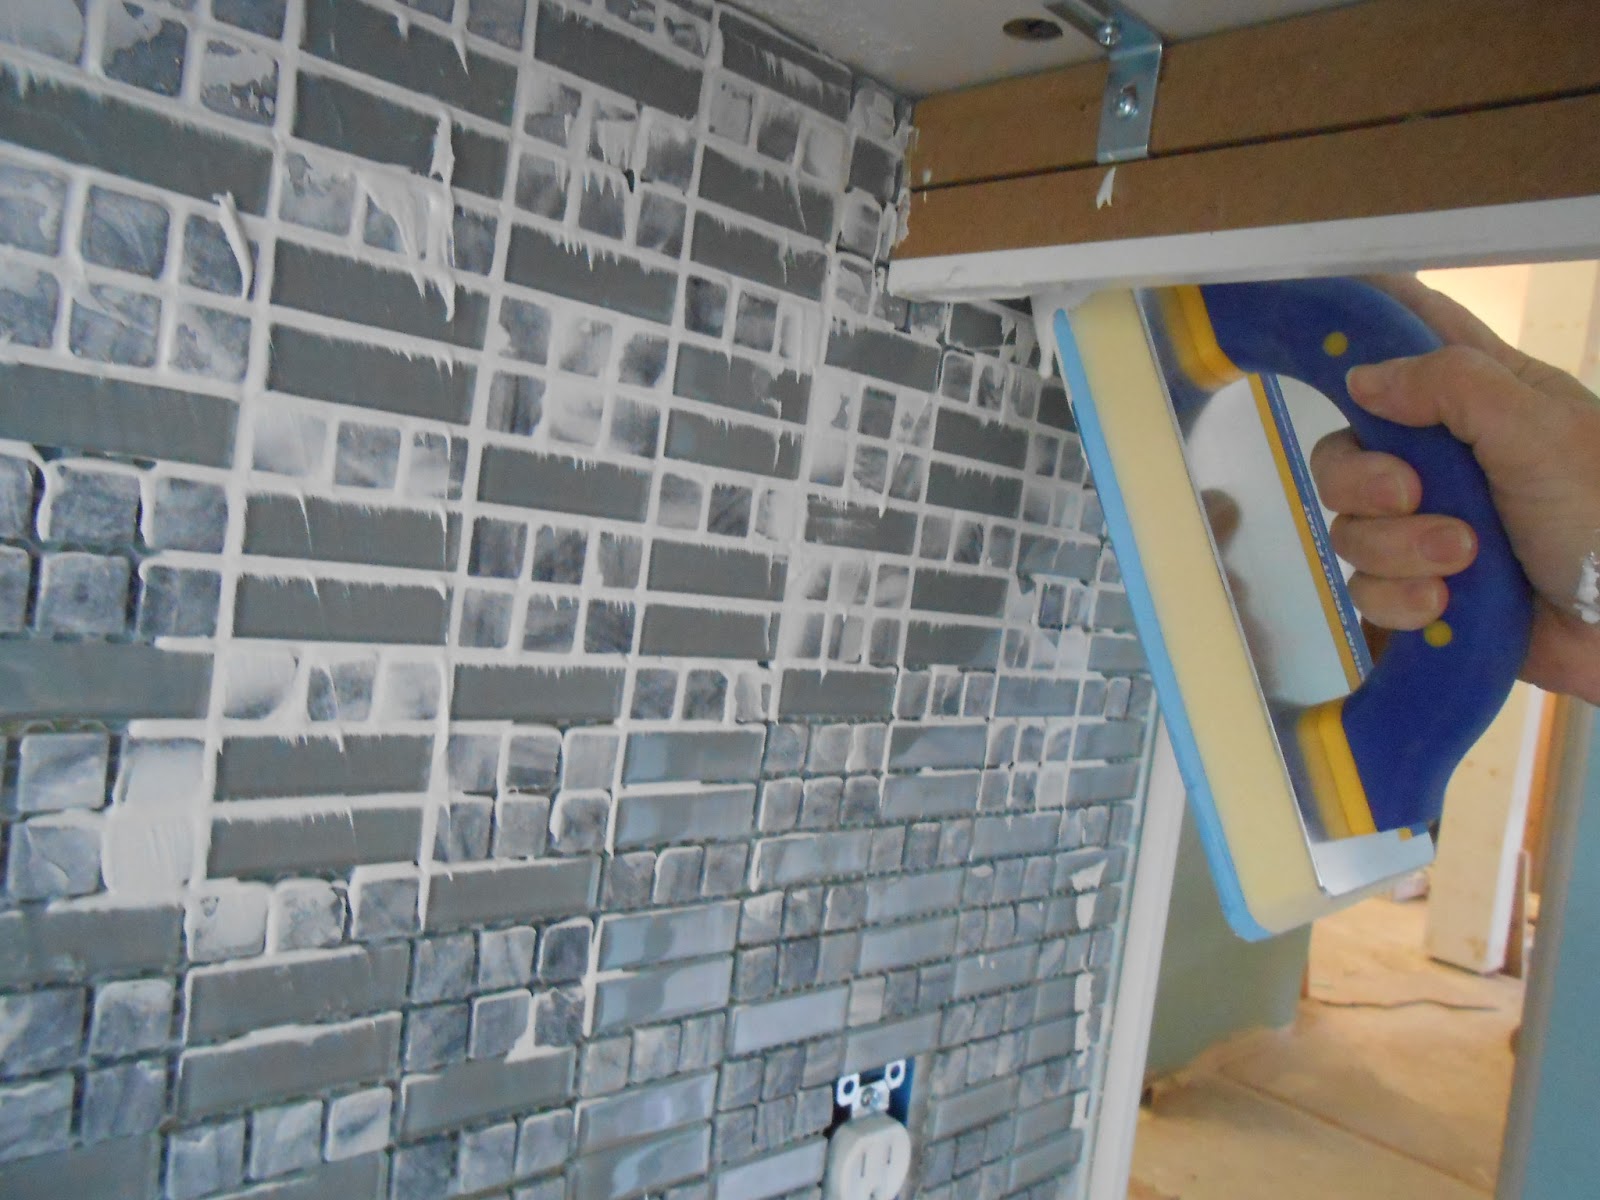
Holding the float at a 45 degree angle, force the grout into the cracks.
Go back and forth, did to side, up, down, whatever.
Go back and forth, did to side, up, down, whatever.

FORCE.

Like this.

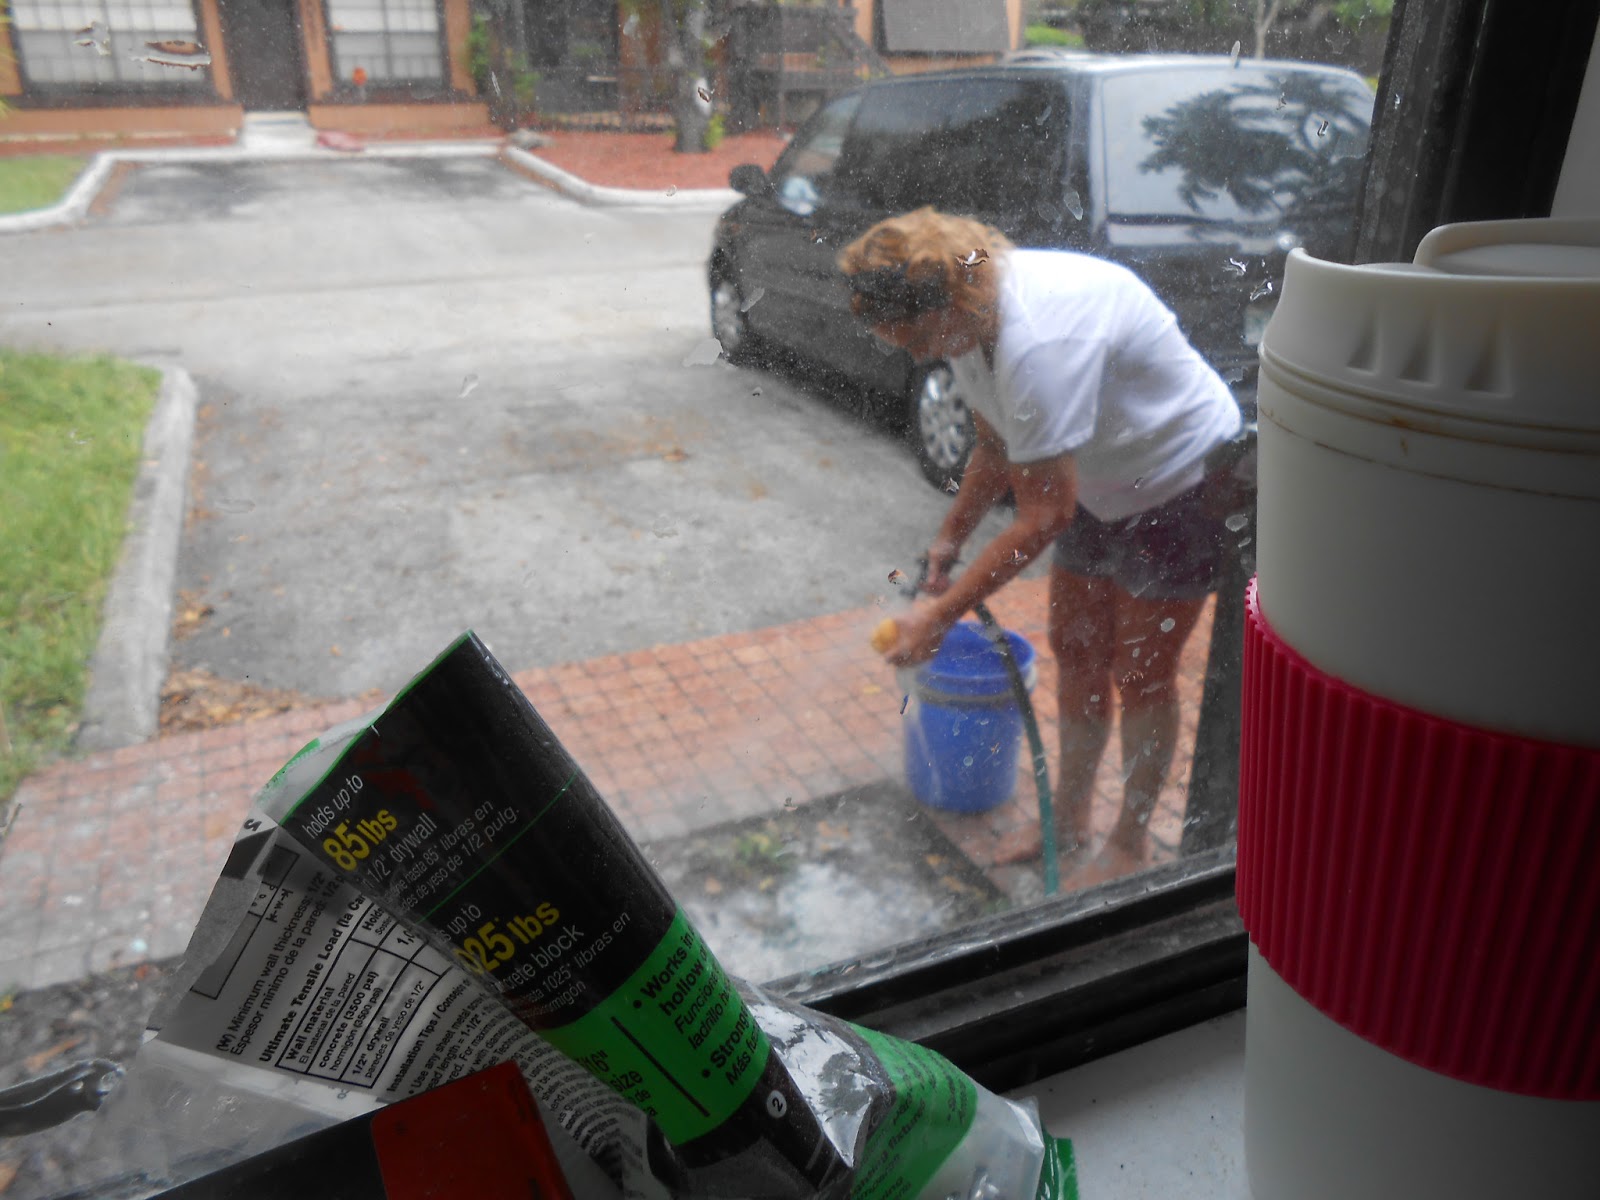
After 20 minutes or so, go over the whole area with a very dry damp sponge.
Wring that sucker out.
Remove all excess grout from the surface.
Wring that sucker out.
Remove all excess grout from the surface.

It will still have some residue.

Redo anything that didn't take.


Get ready to empty, clean, and refill the bucket a lot.
Not even kidding.
Like every ten minutes.
Not even kidding.
Like every ten minutes.

Do not leave your camera on the windowsill with a precocious 18 year old in the house.

Now go over those tiles with a clean sponge again.

And again.

And there you have it!
A perfectly tiled backsplash!
A perfectly tiled backsplash!

Now all we need are countertops, huh?
2 comments:
This was the part that my husband almost lost his mind on. He'd never done this before, and the guy where we bought the grout said, "a sponge will work fine" (spreading the grout). This guy owns the store and I have no idea whatsoever why he steered us wrong on that. I was at work when the husband did our grout (thank God), but when I came home, it was chaos. The back splash is brown, he used chocolate brown grout... it was all over the walls, the (white) cabinets, the floor, the door frame... it looked like Who Flung Poo, or brownie mix... The sponge he was told to use, WIPED the grout OUT of the tiles... Long story short, we got it cleaned up, but he has to re-do the grout. This time around, he bought a float. Yeah, there was a lot of running and getting buckets of clean water. Your tile is beautiful.
...oh, and the idea of using the brackets under the higher cabinet is really clever. Nice touch.
Post a Comment