
I think it happens to everyone.
Drifts of things will suddenly start to pile up in the corners of a room,
and you have to admit you aren't sure where they came from,
or where they should go,
but you need to keep them.
In my case, there was suddenly firewood and video game crap all over the place.
"Get this organized!" resulted in nothing more than a larger pile crammed between
the sofa and the TV cabinet,
with me trudging past it in defeat.
I began...plotting.
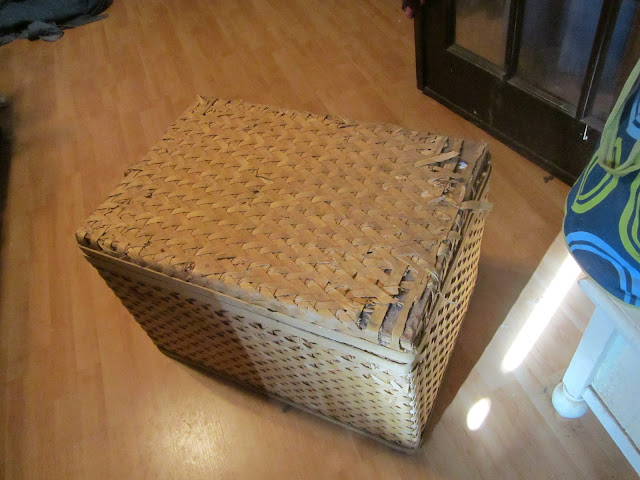
This woven chest came home with me from Target a few years ago. It was on clearance for $17 with a nice solid wood frame and tons of storage.
It sat in the upstairs hallway concealing paperbacks and spiders for a while.

It also had this delicious slat covering that must have been rubbed down with catnip, heavy cream and tuna. The Feline Overlords rolled on the surface, shredding and growling like cats possessed.
Before I knew it, they'd done their best beaver impressions on the wood.
 However, it was still sturdy and huge, so we started plotting its resurrection,
and we dragged the remnants of the monster to the slab for surgery.
Cue the creaking sound of the craft cabinet opening.

Lo and behold, we found a denim slipcover saved from the last set of living room furniture.
That's plenty of fabric!

We did a loose lay over of the fabric just to make sure.
You'll also need:
Sewing scissors
Batting
Ribbon trim
Upholstery gun and staples
Hot glue gun and glue sticks
A couple of straight pins

The denim will make the piece blend in, while the ribbon will give it a little pop.

Cut the cotton batting to fit the lid of the trunk for just a little loft and softness.
Glue it to the surface if you need to.
Ours stuck firmly to the wood all by itself.

Cut the fabric to fit the lid with several extra inches. You can easily trim the excess off later.
Beginning with the front, use the staple gun to afix the fabric to the frame with two or three spaced staples, pulling it snugly across the length.
Repeat this on the other three sides.
Fold and staple nice neat hospital corners.
Now add more staples so that this cloth will be found still attached to the trunk by archaeologists.
 Smooth, huh?
Repeat this process for the bottom of the trunk.
We didn't use batting for this, but if you like the effect, you can.

Secure it really well with upholstery staples.
I like to make sure they're in every four inches or so.

Warm up your hot glue gun.
Working in six inch sections, zigzag the glue around the perimeter of the lid.
Press the ribbon over it.
I used a couple of straight pins to hold it in place while the glue set.

TA DA! I have a brand new trunk to hide the mess, and since I was stash busting,
it cost me NOTHING.
Nothing is my kind of price tag.
With a tray on top, it'll double as a perfect side table too,
with easy access to games, game controllers, and game systems.
And no one has to be the wiser.
4 comments:
Great idea...I love the combination of denium and the cute trim.
Brilliant transformation. Free too! You rock!
Ooh, great rehab of a disintegrating rattan piece! I always tend to assume they are throwaways, but no!
Very resourceful..as usual!
Post a Comment