The following post is presented in Vannah Vision:
Sewing stuff Part II? Awesome!
Ok... so now for the side bag... Remember how the last bag was easy to make? Well, we'll have no such luck with this one. First, cut two pieces of fabric. However, the two pieces of fabric aren't going to be the same length. See? Already more complicated. For the patterned fabric, you're going to want a piece of fabric that is going to be twice the height of your desired bag plus twice the height of your desired 'lip' (this part wraps around the arm of the chair and will have velcro on it to keep it on). For example, our bag is going to be 11" tall with a 10" lip for the velcro, meaning this piece of fabric is going to be 42" x 12" (the width of the bag). This is already so complicated @_@
The lining fabric doesn't need to be a part of the lip, so it only needs to be the length of the pocket itself. for example, our lining fabric only had to be 22" x 12". This is just ridiculous...
Ok, next you're going to fold your fabric to put the seams on! Make sure to measure where you've folded so that your 10" lip really is a 10" lip rather than a 12" one, throwing off all of the other measurements and.... and we don't want that. Remember, wrong side out~
Make sure your lining fabric, when folded over, is the same dimensions as the pocket part of your bag.
Sew, sew, sew!
Cool beans!
Beautiful~
More sewing? Don't mind if I do!
Fantastic.
Well, in case you weren't forewarned, there's some sewing involved in this project.
And some more of it...
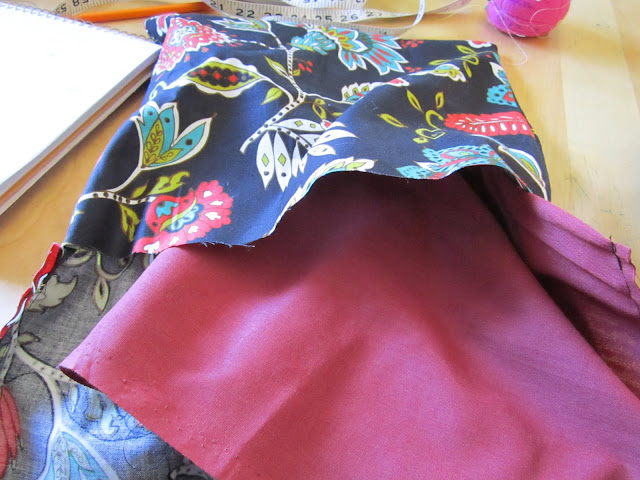
Ok. this part should seem familiar to yesterday's post. Put the lining of the pocket into the pocket side of your bag. Wrong sides touching; patterned side right side out, lining part wrong side out.
Pin the outer edge, but only on the side without the lip/arm thing!
Get it? Only pin the one side of the patterned pocket that doesn't have the arm/lip thing for the velcro. We're getting to that.
So fold over the other side of the lining pocket.
And fold over the edge of the arm/lip thing. Make sure both of the folded over parts touch.
like so.
Your sewing machine may have one of these awesome things.
This is how you get the zig-zag stitch. Have I mentioned my love for the zig-zag stitch? Well I love the zig-zag stitch. I use it waaaaay too much.
Bam.
So you're going to sew the regular edge (the outer edge I guess? This is so confusing...) regularly, and sew the arm/lip thing and the second side of the lining pocket with the zig-zag stitch.
So pretty~
Does this help at all?
This is what it's supposed to look like. Kinda.
Velcrooooo~
Lots of velcro.
Pin down your velcro! (Some people don't know you can pin and sew velcro. It can be done! And it can be done beautifully!)
I pinned mine at the top of the arm/lip. Make sure you keep the scratchy side of the velcro together and the soft side together. It makes everything better.
Bam.
Sew it down~
Cool~
Now to pin the other side of the velcro~
I put mine on the back this time, so it has to make a loop and will stay on better.
Sew it down.
Cool story, bro~
Brilliant~
Of course... this is kind of bland isn't it? I mean, just one large pocket? We need to thrown on some other pockets, jazz this thing up.
Not gonna lie, this is exactly the same way of putting on pockets that I used yesterday.
Fold it over...
Add some ribbon...
Sew it down...
Fold the edges to prevent fraying...
We made two pockets (as is shown below). One large one on the outside for books and stuff, and one smaller one on the inside for a phone (haha, we're forcing Granny to carry a phone! Ha! Mommy even taught her to text!)
See?
We're cool~
 We have one more stage to this project to ensure that this chair is one stylin', functional, fully washable ride, so come back Monday!


8 comments:
Your Mom's chair is definitely stylin!! We're almost outta here for a week and I'm going unplugged. Talk to you soon. Pics of our get-away is on the blog!
wow,
smiles,
fabulous post.
Jingle appreciates your support to our poetry potluck.
Our week 41 Theme is: Saints, Monks, and Meditations,
Yet, old poems or poems unrelated to our theme are welcome… ;)
Always, your poetry is sunshine to us!
Looking forward to seeing U on Sunday, 8pm or later.
Stay Blessed,
Love and hugs.
xoxox
Note to Vannah: I am planning to learn to sew this year. I bookmarked both of these tutes because you make it sooooo accessible. Thank you, thank you!
The chair now has much flair, love it!
Your mom really is stylin' now! Great job!
chariots of fire!! Thanks, Savannah, I actually GET it. All I need now is a sewing machine that is a teensy bit bigger than my £7 travel number with... no buttons or anything. Help me out, Santa, will you?
Great job Vannah! I love when we can uses crafts to improve everyday life..in your Grandma's case...her access to her stuff while in the CHARIOT OF FIRE :)
Grandma must have the most stylish wheels in town!
Post a Comment