Before we get started today,
let's take a little trip down memory lane.
The floors on that lane were hideous.
I mean BAD.
None of them matched, the transitions were a wreck.
and the adhesives were loose.
Some thresholds were impossible for my mother to get her wheelchair over.
The white tile was laid over a previous tile floor, so you can imagine
how perfectly level that was.
The whole place was a mismatched crazy quilt of dated flooring
with no warmth that was hard to navigate.
How does one decorate around MAUVE???
This stuff was begging to come up, and here at
Everything You Ever Wanted to Know About Hard Core Remodeling but Were Afraid to Ask!
we were happy to oblige.

Our solution to this fiasco under foot was bamboo hardwood in a warm toast shade.
At $1.88, 1100 square feet of this gorgeous, environmentally friendly flooring
came in under $2100, and there will be NO thresholds.
Seamless.
So no obstacles for the wheelchair!
And in a disability remodel, these are major considerations.
Now, wanna find out how easy it is to put down your own flooring?
Strap on those knee pads and let's get it on!
Not. One. Word.
Unwrap the flooring and let it acclimate for 24 hours
so it can come to temperature and expand or contract in your environment.
Do yourself a favor...
don't skip that step.
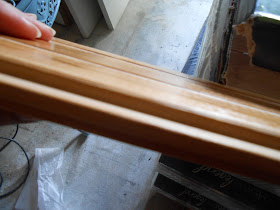
There is a "male" side of the board...
...and a "female" side.
These fit together by inserting them at a slight angle and snapping them
gently together by bringing them level.
Start by dry fitting them just to get a feel and to
decide on the pattern you want to lay them in.
Find the center of the room and mark the Center Line.
Measure across...
...and then down from the door about 8 inches.
Nailing a 2x4 into your starting position to butt up against will make this a breeze.
Set the center of two flooring planks at the center line.
This is your flooring adhesive.
Slathet it all over the ends and the female joint of the plank.
With a damp rag, wipe any glue that oozes up through the cracks immediately.
Make the run all the way to the walls.
Use a circular saw to make the cuts for the end boards.
Keep in mind, the edges will be hidden when you put down the molding.
Now, repeat.
Is it really that easy?
Oh yeah.
Before you know it, you'll have this fresh, durable new floor.
Make sure your sub floor is level and clean before you start,
and then go put your best foot forward, saving a small fortune over having it installed
by doing it yourself!


Yea-- FLOORS! With spawn and pets, carpet just seems stupid so I've always been curious about how hard it would be to put in wood floors. I always assumed, wrongly it would seem, that since the charge a buttload for their professionals to do it, it must be super hard.
ReplyDeleteSince we're hopefully going to be buying our first home soon, I'm delighted to know that isn't the case and will DIY!!
Susan, this was deceptively simple, I promise. I definitely recommend the 2x4 to keep lines straight, and we later marked the floor with long lines at intervals to keep us on track. Honestly, I've put together Lrgo castles that were harder!
ReplyDelete