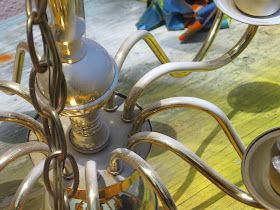
Last September, Savannah and I spotted this brassy hussy in a yard sale, and we slammed on brakes, leapt from the car and snatched her up for $20. She was speckled with most of her bulbs, candle shades which we already made into ghosts and snowmen, and crumbling candle sleeves, but we had plans.
So home she came, languishing in storage while we did our holiday thing.
Sunday was the day.
First, test the electrical to ensure your twelve armed throw back works. Then, swathe all wiring in plastic wrap.
Once that's done, haul her outside...
...to your fancy sideyard work bench.
Primer. No skipping.
I used 2 light coats.
No drips or runs.
Once the first coat dries, flip her over and keep going until there's not a shiny bit of brass in sight. Let this dry for an hour.
Now break out your bead stash and some fishing line and let's get to work.
Hmmmm, starfish.
And angel fish.
And oooooooooo sparkly!
Fashion some drops using THIS basic method to tie to the arms...
...and secure the ends with office clips.
This is a 12 arm chandelier, so I made 6 elaborate drops and one continuous chain with 6 more drops.
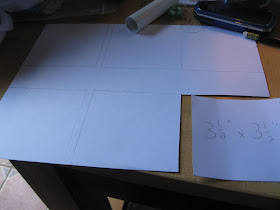
Meanwhile, Savannah measured the circumference and height of the candle sleeves.
She transferred the dimensions onto card stock and cut 12 squares.
Using one of the candle sleeves as a guide...
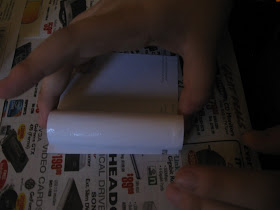
...she rolled the cardstock around it...
...and secured it with tape.
Take a minute in here to go spray the chandelier down with 3 light coats of gloss white.
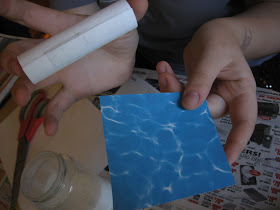
She then cut slightly larger squares of scrap booking paper in a water pattern...
...and using homemade decoupage medium...
...well, she decoupaged the paper onto the new candle sleeves, tucking the raw edges in.
Bring the chandelier inside and hang it from a curtain rod to assemble.
Now, identify a truly hideous light fixture in your home that makes you cringe in horror each time it illuminates and remove it.
Cuz this is MUCH better.
So much better
However, now that I'm looking up, I'm reminded that the painting needs to get finished...


BRAVO! I especially love the beaded embellishments. I really want to do something fun in the girls treehouse with a light fixture. This is so inspirational. Great job, Sunny!
ReplyDeleteHappy Monday!
SOOOOO pretty!! We just passed a chandy up and the Goodwill too. Bad us!
ReplyDeleteOh, yikers, Sunny! This is gorgeous and so creative! I have never seen anyone make custom candle sleeves like those - that is my FAVORITE thing about this! But all the beading is lovely - ooh, man, I want those fishy and starfishy beads.
ReplyDeleteYou and Savannah have outdone yourselves this time. Isn't it fun when you get to play around doing a crafty little bead craft, and then attach it permanently to your house and suddenly it is extremely actually valuable? You would have had to pay MUCHO dinero for a chandy even close to this (but would never have found one that'ssuch a perfect match to your beachy decor).
What a fun makeover!
ReplyDeleteCara
http://miscellaneousme.wordpress.com
Wow, what a transformation!
ReplyDeleteSuper cute! I love fish. What a fun house you live in. :)
ReplyDeleteWow! I especially love the twinkle of the blue beads!
ReplyDeleteThat is fabulous, once again you show us how valuable a can of spray paint is.
ReplyDeleteThe chandy is so bright and cheerful and so perfect for your home now. I love watching the changes you are making in your house. It's really coming together beautifully!
ReplyDeleteSarah
Very pretty! I love the beads. What a crafty person you are.
ReplyDeleteI love this!!! And it's something I can do, AND afford LOL Plus I could get the munchkin to join in and help. How does the paper hold up next to the heat of the light bulb? Bummer I can't paint the chandelier though...We need to get our own home, this renting thing sucks for a creative person LOL LOVE IT!!
ReplyDeleteHow dramatic and fun!
ReplyDeleteThat's awesome!!! What room did you put it in?
ReplyDeleteSooooo pretty! Love what you did w/ that brassy hussy! She really had it coming though didn't she?
ReplyDeleteLove it! It looks awesome! Now I gotta keep my eye out for a chandy to remake.
ReplyDeleteThat is one heck of a chande makeover...I LOVE it!
ReplyDeleteThat looks great! I love it!! You did a fantastic job on it, and it fits perfectly in your house. :)
ReplyDelete~Chelsea
What a great find!!! Love that chandy!
ReplyDeleteHow fun is that? I am going to be redoing the chandelier in my dining room soon...so I loved reading this.
ReplyDeleteIt looks so much better!
I found you from Blue Cricket Design.
What a great way to repurpose an outdated light fixture. I love projects like these. You are an inspiration!
ReplyDeleteso cute!!! love the beads!! :)
ReplyDeleteI'd love for you to link this up to my new link party, Your Whims Wednesday! http://mygirlishwhims.blogspot.com/2011/04/your-whims-wednesday-1.html
Wow! What a transformation! Great tutorial by the way.
ReplyDeleteHeather
I got one of those brassy chandy's in the garage awaiting a spray.............thanks for the tutorial.
ReplyDeleteI just found your blog and am your newest follower! You are one talented woman who has left me completely inspired. Thanks for the great blog and I love the fab chandelier and tips!!
ReplyDeleteWhat a transformation. You are so creative. Hugs, Marty
ReplyDeleteIt looks great! What a great find and even better transformation!
ReplyDeleteLooks great! Just got my first chandy to revamp..can't wait!
ReplyDeleteoh wow! That is really pretty! Great makeover! Thanks so much for joining me at Anything Related!
ReplyDeleteSo simply dandy!! The fishy's are my favorite. Thank you for linking to my K.I.S.S. blog bash this past week. I so appreciate you taking the time to share your charming chandy. Tomorrow is another blog bash, please drop by & share more of your inspiring ideas!
ReplyDeleteDrop By The Tattered Tag
Ah yes! So much better! Great job!
ReplyDeleteThanks for linking up to Making It With Allie! I can't wait to see what you have for next week!
AllieMakes.Blogspot.com
Oh, wow! Love the under the sea theme! How original! Love the beads and the water cardstock covering the candle holder thingies. Seriously cool! Thanks for linking up!
ReplyDeleteSunny, this is absolutely beyond fabulous! As soon as I saw that you had linked up to Inspiration Friday I knew that I had a treat in store for me and sure enough...a feast for the eyes! :-) Thanks for joining in the fun this week~
ReplyDeleteVanessa
Great makeover and tutorial! Thanks for linking Flaunt it Friday.:)
ReplyDeleteThe last thing I wanted to see today was more light fixtures. I have poured over literally thousands on-line trying to find the right ones for our re-model. HOWEVER, once I started scrolling down through the pics, I just could not stop! You have done a remarkable job on this project! Brava!
ReplyDeleteI am SO impressed!!!
ReplyDelete=)
How cool is that? I'm impressed. I can sense your pride with your step-by-step instructions and photos. You did an excellent job!
ReplyDeleteYour newest follower,
Cathy Kennedy, Children's Author
The Tale of Ole Green Eyes
Read today's posts ...
C is for…Alphabe-Thursday
OH, so cool :) !
ReplyDeleteBlessings,
Catherine
WooHooOOOo! FUN project!!!
ReplyDeleteSo much better. I love it!
ReplyDeleteWow. What a totally cool chandy project! I love this!
ReplyDeleteAbout a year ago I went to this model home where they painted the ceilings the same color as the walls. In my mind it sounds like it would make the room darker, but it didn't. Your ceiling in that room would look so cool painted the same color as the walls. Your light would really pop then!
Thanks for a clever link!
A+